How to Add Personalized Text on a Product in Shopify
Written by Renaud Teasdale
January 26th, 2024
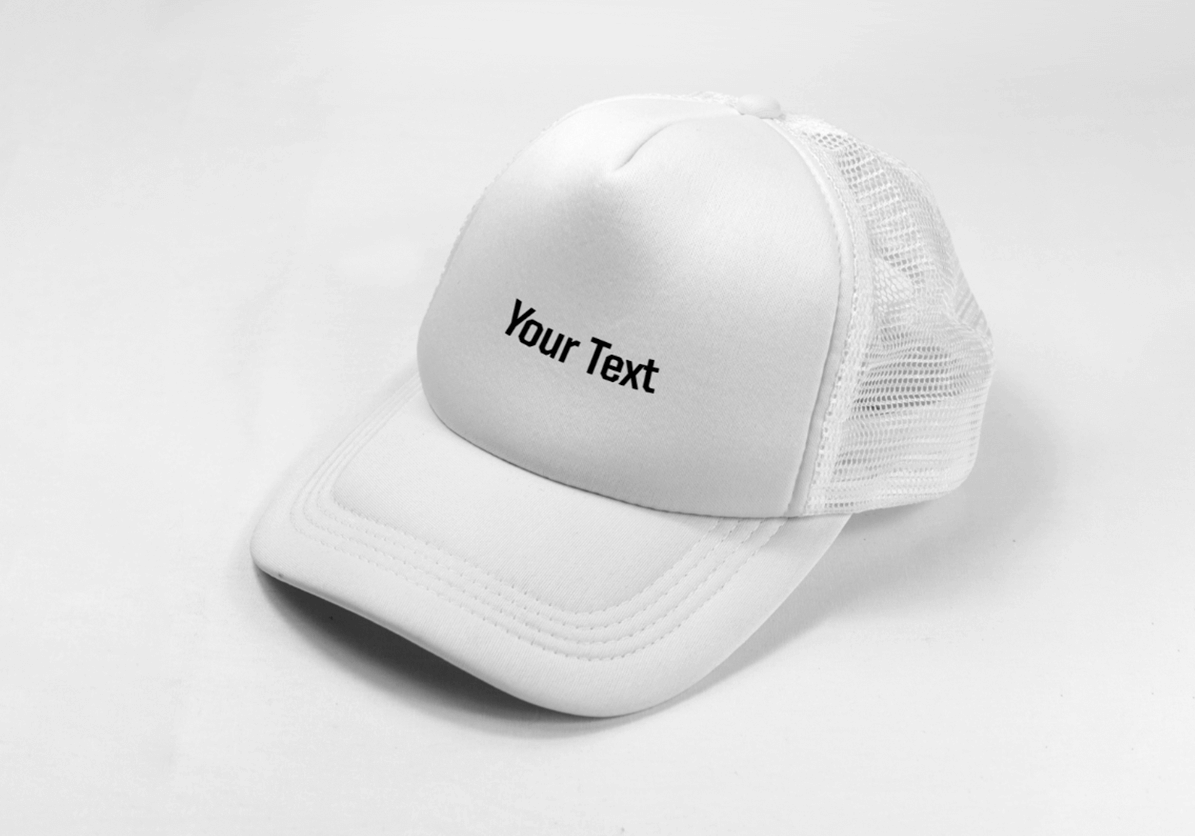
Table Of Contents
If you want to know how to add personalized text on a product in Shopify, this guide will show you how. Adding customized text to your Shopify products can enhance customer satisfaction and increase your revenue. Personalized text is an excellent way to customize products, delivering unique and custom-tailored products that satisfy your customers’ needs. Customers become co-creators in the product customization process, giving them a say in their final products.
Customers like to personalize their products for many reasons. First, it allows them to create a product unlike anything else on the market. This can be a great way to show off their personality and style. Second, adding custom text can make a product more meaningful to the customer. The personalized item can serve as a reminder of a special event or occasion or simply be a way to show someone how much they mean to them. Also, personalized text can help customers promote their brand or business. By including custom text on their products, they can get their name and message out to the world in a fun and creative way.
This article will show you how to quickly add personalized text on a product in your Shopify store using Kickflip. With Kickflip, adding custom text to your Shopify products is easy and only takes a few minutes. Plus, your customers will be able to visualize their personalization in real time, which ensures they’re happy with their product before ordering.
Benefits of Offering Personalized Text on Your Products
Providing your customers the opportunity to customize products by adding a personalized text option can benefit your business. Here are some of the benefits of enabling personalized text features for your products:
Enhanced customer experience and engagement. Allowing customers to create customized text on your products gives them the ability to create personalized messages on their products. Participating in the creation process makes the buying experience more enjoyable and improves customer satisfaction with the final products.
Competitive advantage. Customization can set your business ahead of competitors. Many product businesses do not offer a personalization option. By providing personalized text, you cater to the customers’ desire for exclusivity and individuality.
A deeper understanding of customers’ preferences. Offering text customization provides a valuable opportunity to gather insights from your customers. By analyzing the custom text inputs, you gain a deeper understanding of the types of customization, quotes, and themes that resonate with your audience. This information can be beneficial for the development of future products.
Stay on top of technological advancements. According to a recent Accenture report, there is a rapidly increasing rate of change in businesses, with technology being the driving force. Using the latest technology to allow your customers to personalize their products helps your business stay ahead of the curve by offering personalization technology.
Increased sales. Personalized text is a way to improve your customers’ experience and generate more sales. According to a McKinsey & Company report, companies that excel at personalization see 40 percent more revenue than other businesses. By giving your customers the option to craft their own unique messages on your products, you enable them to have more input on the final product, improving satisfaction, sales, and customer retention.
With all the benefits of offering personalized text on custom products, many companies are jumping at the opportunity. Here are a few examples of businesses that offer custom text on their products:
Converse lets customers personalize their shoes with custom text, colors, and fonts.
Dodocase enables customers to create custom iPhone and iPad cases with monogramming.
Tiffany and Co. has an option to add custom engraving to jewelry.
How to Add Personalized Text on a Product in Shopify
Kickflip is a popular choice for Shopify store owners who want to offer personalized text on products, as it offers a user-friendly interface that is accessible to everyone.
This video shows how to allow customers to add custom text to your product with Kickflip. For a deeper understanding, here’s a written guide on how to use Kickflip to enable personalized text in your Shopify store:
Install Kickflip
If you haven’t installed Kickflip already, go to the Shopify App Store and add the Kickflip Product Configurator app to your store. The app is free to install, so you can start building your product customizer right away. Once you install the Kickflip app, log in to the Kickflip dashboard and create a new product.
Upload Your Product Image
Within Kickflip’s product builder, hit the Add new question button and select:
Input type: None
Display type: Image
From there, hit Create.
On the right-side panel, click on + Image answer and upload your product image. To optimize performance, we recommend a size of around 1200x1200 pixels. If you would like to show several views of your product, click on + Product view and then upload your images.
Add Personalized Text to Your Product
Now that your product image is uploaded, it’s time to add your custom text. To do this, hit the Add new question button again, select Text Input and Text, and then hit Create.
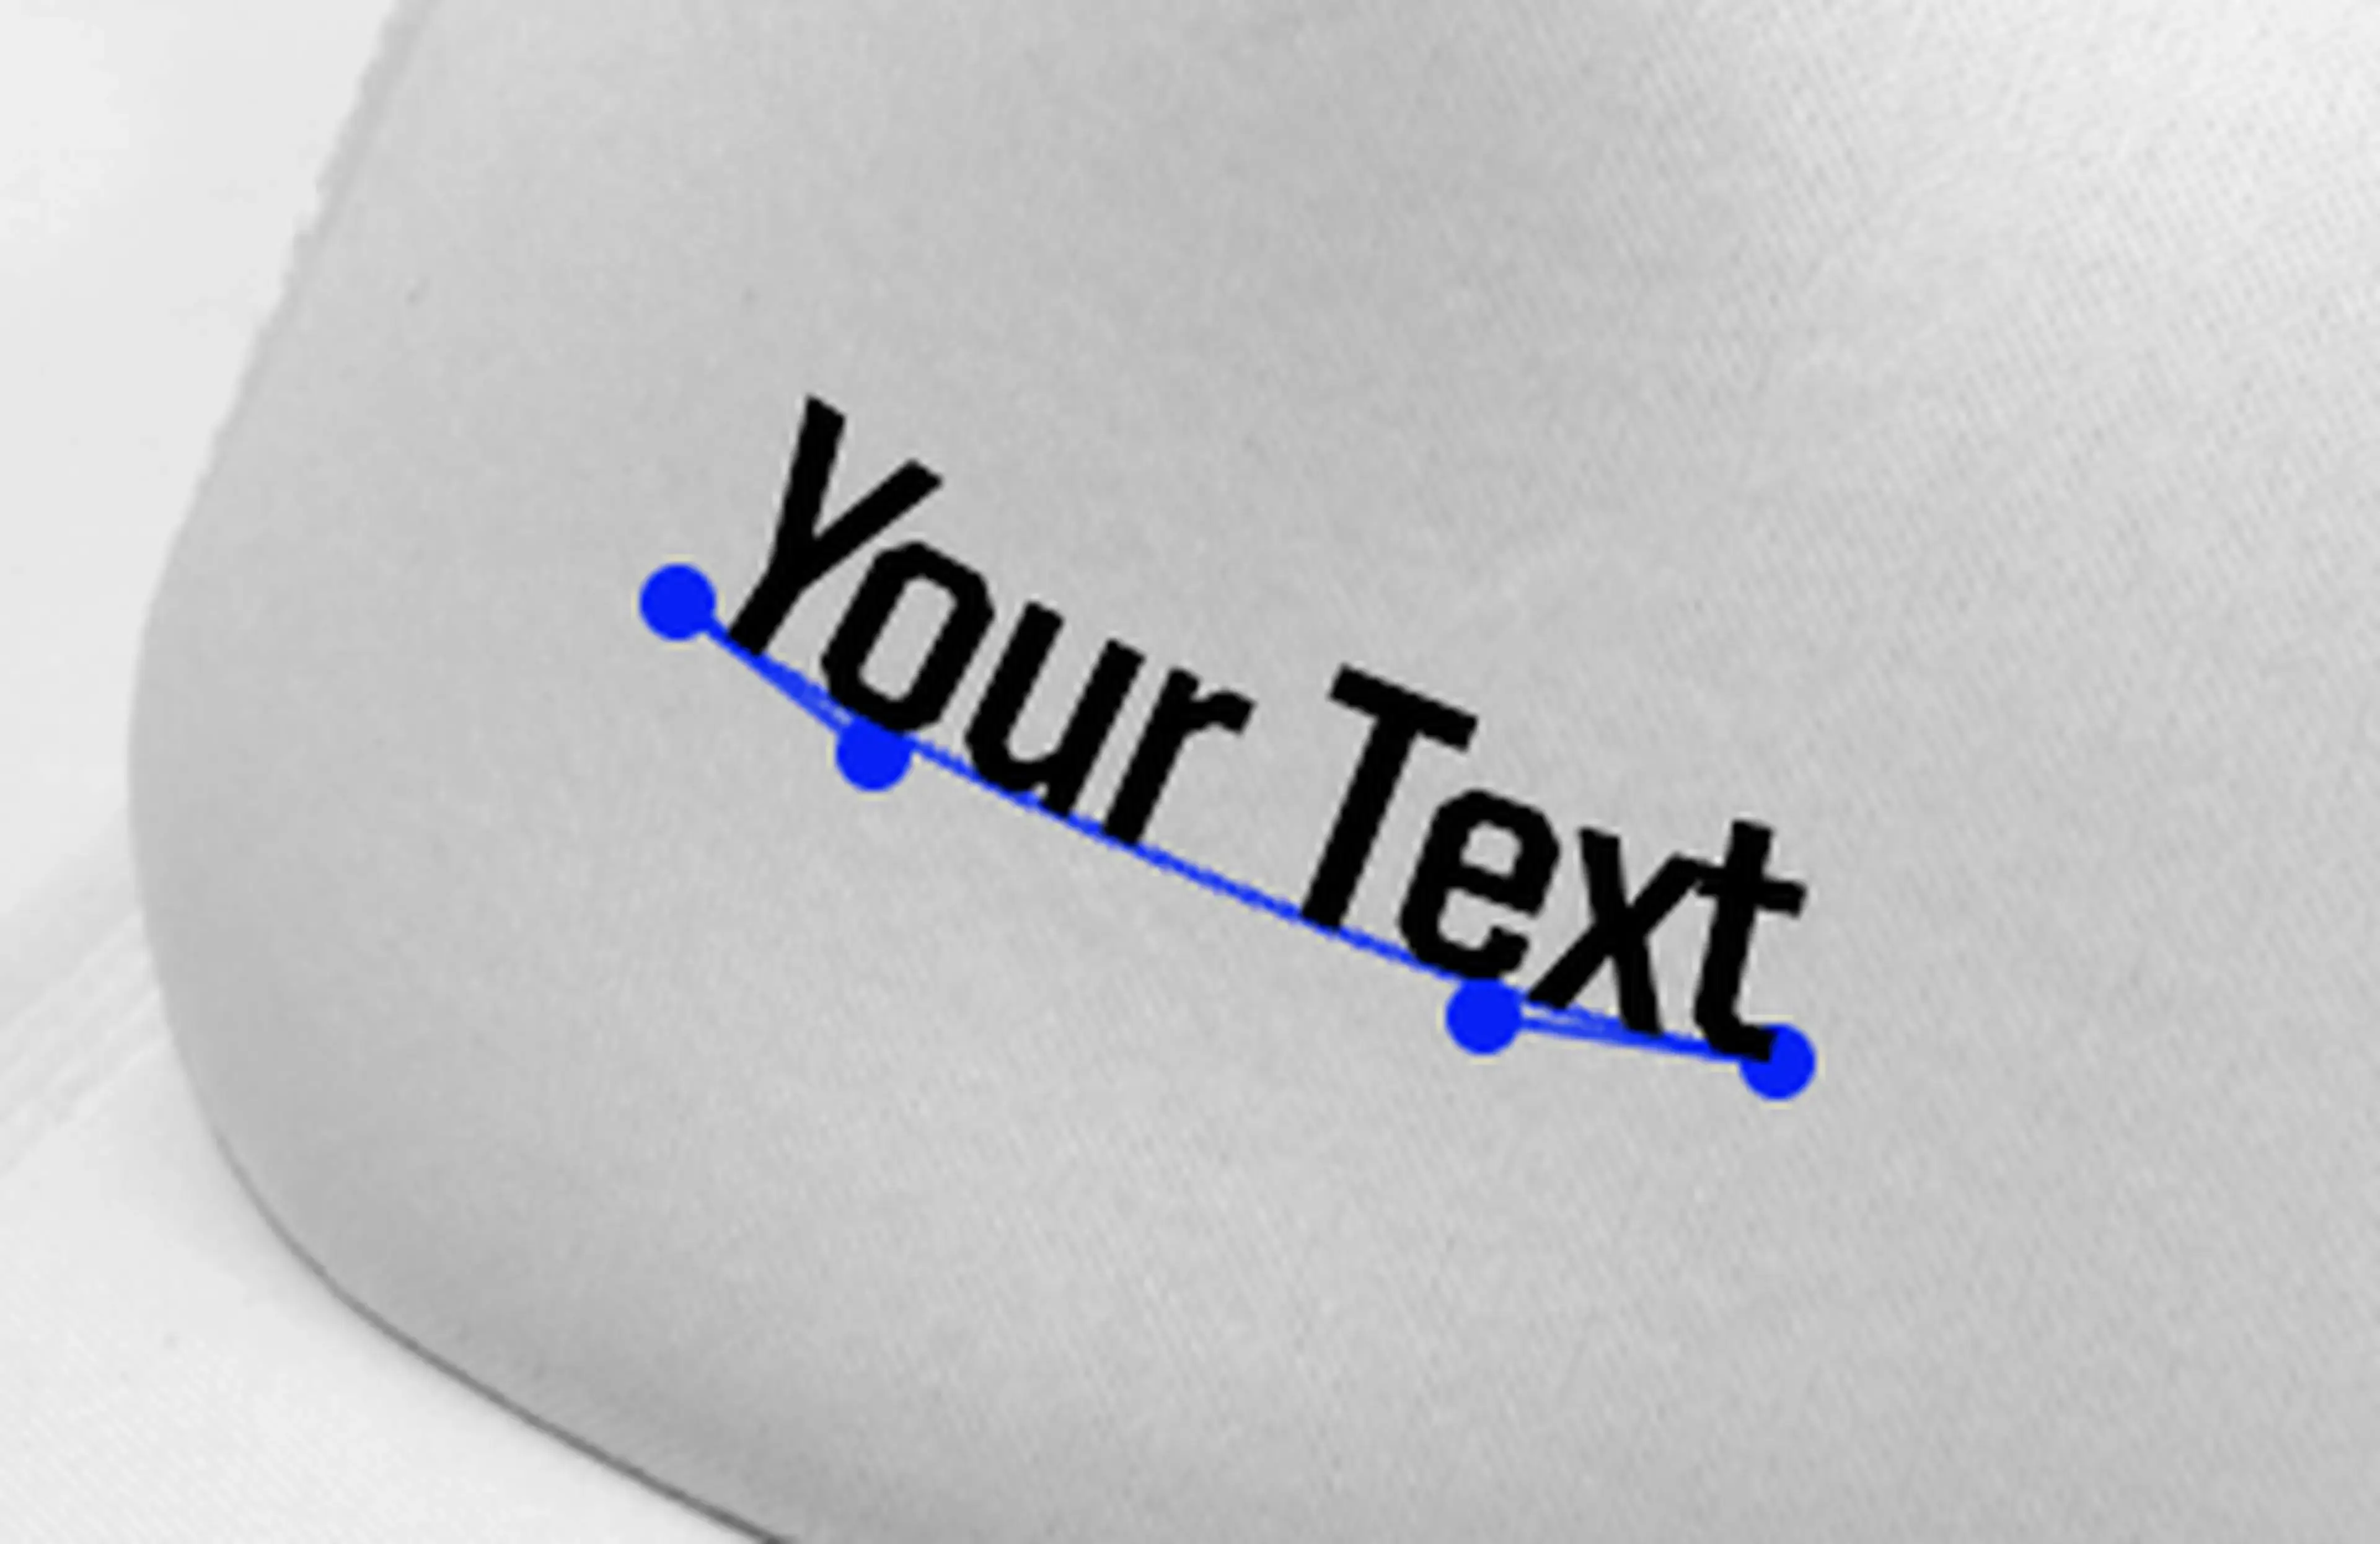
Your product image shows text on a blue path. You can click and drag it to place it where you want.
Choose the correct type of text
Choose Path if you want your text to be displayed in a straight line. Path allows you to move both endpoints of the line to change its shape.
Choose Curved Path to display your text on a curved line. Curved Path allows you to change the curvature by dragging the handles.
Choose Multi-line to display your text on multiple lines within a box. You can add as many lines as you want by clicking resize the box and you can rotate the box.
Align your text
Use the alignment buttons to align your text to the left, center, or right.
Display your text on multiple views
If you have uploaded images for multiple views of your product, you can change which view your text is displayed on by selecting it from the View drop-down menu and then selecting Show on view.
Upload a font
To upload a font, simply drag and drop it within the font section. If you are primarily targeting users with modern browsers, you can only upload WOFF and WOFF2 formats. If you want to expand support as wide as possible, upload OTF and TTF files.
Want to offer more than one font? Simply hit the + Font question button to create a font question where your customers can pick the font they prefer.
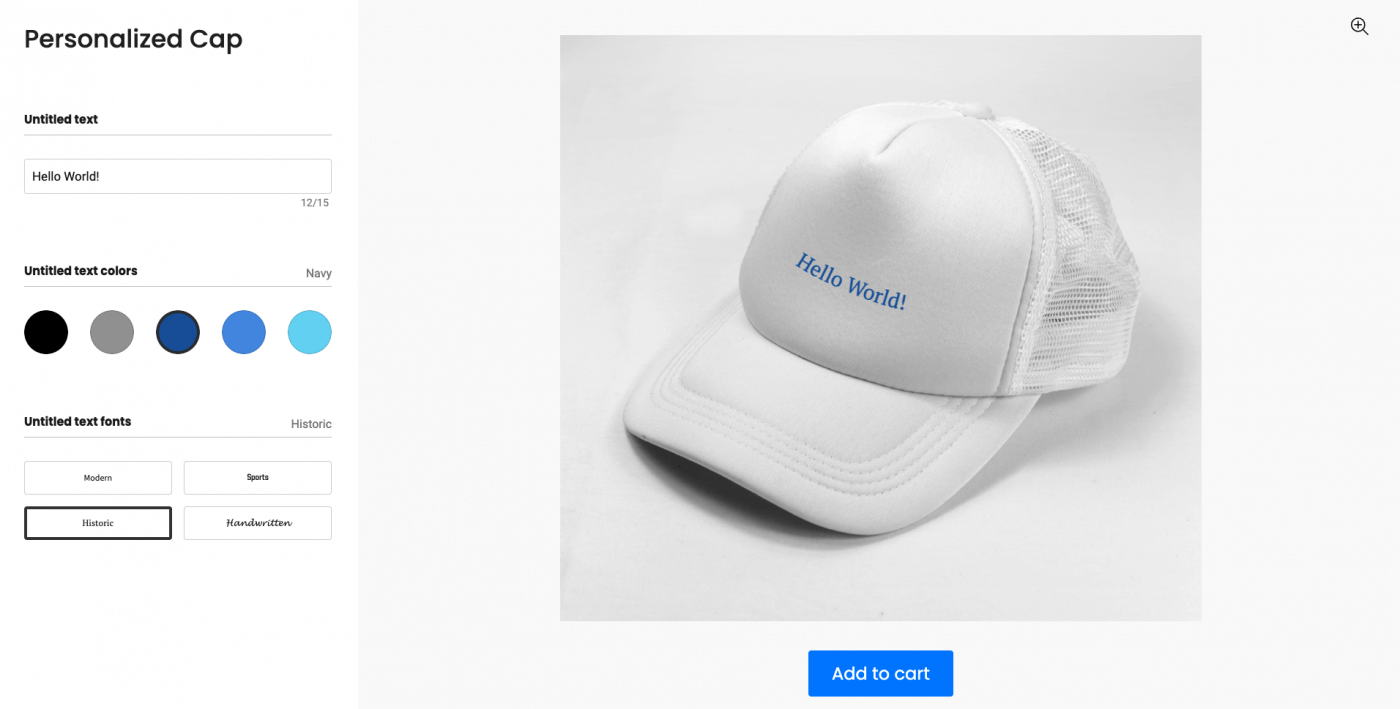
Adjust your text size
You can easily adjust your text size within the Size section. You can do so for each view you are displaying.
Change your text color
To change your text color, go to the Color area and click on the color circle next to Default color. Then, use the color picker or type in a Hex or RGB code.
Want to offer many text colors? Simply hit the + Color question button to create a color question and add more colors. From there, your customers will be able to pick the color they prefer.
Specify the maximum character limit
You can add a character limit to your custom text under Settings within Text max length. We recommend toggling on the Show character count setting to help your customers stay within the character limit.
Activate the ‘bad words filter’
Of course, If you allow customers to add custom text to your products, there is always the potential for them to write curse words. This could damage your brand reputation, and no one wants that. To avoid this problem, you can either closely monitor the custom text that is added to your products before manufacturing or simply activate the ‘‘Bad words filter’’ to prevent certain words from being used on your product.
Explore other custom text settings
You can explore many other settings to customize your personalized text product further. You can add a text outline, create multiple positions and sizes, apply a text modifier to make sure all text is in uppercase or lowercase, and more.
 There are even more features for custom fonts. If you’re planning to sell custom neon signs, simply toggle on the Neon effect, and your custom text will be turned into a bright neon sign! Are you engraving text on your product? Kickflip also comes with a neat Engraving effect.
Putting Your Personalized Product in Your Shopify Store
Now that your custom text is set up, it’s time to publish your product. Once you’re happy with your customizations, simply click the Publish button at the top right corner of the screen.
Then, you can go to your Shopify store's admin panel, and a product with the same name as your Kickflip product will be there. It will be ready to be added to your store, which you can do the same way as for any other product.
All that’s left to do is sit back, relax, and wait for the orders to come in! When they do, go to the Orders section of your Kickflip dashboard to see all the customizations your customers have made and start manufacturing your products.
Let the Orders Roll In!
You’re now all set to start selling custom text products in your Shopify store. You can also offer many other customization options for your products using the Kickflip app for your Shopify store. Whether you sell t-shirts, furniture, or jewelry, Kickflip has a user-friendly interface that allows your customers to customize their products. Increase your revenue, improve customer satisfaction, and deliver the best products with the help of Kickflip.
If you have any questions or need help getting started, contact our support team or check out our complete documentation for more detailed instructions.
Future reading
How to Improve Your Shopify Product Page
How to Write a Shopify Product Description that Sell
10 Best Shopify Product Customizer Apps in 2026
Share This article

Written by Renaud Teasdale
January 26th, 2024
Renaud Teasdale is the co-founder and CEO of Kickflip, a product customization platform for e-commerce brands. Since 2010, he’s been focused on helping merchants turn product personalization into a scalable, high-impact revenue channel.
Maarten Luyckx
Osaka World
The user-friendly interface of Kickflip, combined with excellent customer service, ensured that this project was brought to a successful and beautiful conclusion.
Shopify App Store
May 20, 2021
Marie-Laetitia Rossazza
My Dust Bag
It took me a long time to find the perfect customizer app, and I’m so happy to say that I finally did! Kickflip is truly the best app on the market. The front end and back end are excellent, and the team behind it is incredibly kind and helpful!
Shopify App Store
September 1, 2023
Brad Jurga
All-Star Sporting Goods
Kickflip made everything easy, from designing the builder all the way through launch. We’re designing truly custom equipment for elite baseball players and this platform allows us to have better engagement and excitement around our brand. We’re seeing an instant return.
Shopify App Store
June 16, 2025
Kasper Taylor
CodedInk
My experience with both the product and the support team has been fantastic. The user interface and user experience are excellent. The features are powerful, and the WooCommerce integration is seamless and easy to set up.
G2.com
June 16, 2025
Saber Naceur
Vinylacy
By far, and I truly mean it, the best customizer available on Shopify. It’s easy to understand and manage, offers options for all types of products, and works extremely well. On top of that, it looks beautiful and feels premium. Highly recommended.
Shopify App Store
December 17, 2022
Jesus Guillermo de León Pérez
Dismo
Kickflip is a fantastic tool. It’s super intuitive, easy to use, and packed with capabilities. You don’t have to be an expert or have experience with other products to get started. The support team is also great and very responsive.
Shopify App Store
July 10, 2024
Frieder Urban
Era of Arc
We were looking for an uncomplicated configurator that was quick and easy to set up, offered plenty of design options, and worked reliably with fast loading times. We tested many configurators on the market, and with Kickflip, we found exactly what we needed.
Shopify App Store
October 10, 2024
John Taggart
Jack Harry and Ollie
What a great addition to our business Kickflip has been. It’s been fantastic to offer our customers the ability to personalize their orders. The support has been excellent, and we especially love that the pricing is tied to our success as customers make purchases.
Shopify App Store
May 7, 2021
TJ Garske
The Net Return
Kickflip saves our team a ton of time by eliminating the need to create custom mockups for customers. Customers can build their product themselves and place an order instantly, without any back-and-forth.
G2.com
January 26, 2026
Amin Hasani
CURVD
After extensive research into product customizer tools, we chose Kickflip for many reasons. We don’t like complicating simple tasks for customers, and Kickflip helped us simplify the process and create a seamless customer experience.
Shopify App Store
July 29, 2025